
DIY lined envelopes
 We’re getting crafty today with some super easy, festive and up-cycled DIY lined envelopes. These envelopes are a cute and simple way to jazz up your holiday cards. Every year, we send out a photo card, usually of the kiddos, unless we’re feeling extra cute and then my husband and I will sometimes jump in the pic, too.
Since the Buddy was born, we have always made our own 4×6 photo Christmas card using Photoshop on the computer. And by ‘we’ I mean my husband. He is all over that card making stuff and I like not being limited to the pre-made designs from the store. I’m picky like that. If I’m being completely honest, I’m cheap, too, because it’s way less expensive to print off 4×6 prints than to order the photo cards from the store.Anyway, we get our 4×6 photo prints, but then are on our own to buy the envelopes to mail them. I usually pick up a box of plain white stationary envelopes that will fit the 4×6 prints at the office supply store or Walmart. But plain white can be booooring, so this year I wanted to jazz things up a bit and add a bit of flair to these plain ‘ol white envelopes.
Way back when my husband and I were first engaged, I was a super young art education student about to start my student teaching semester. One of the teacher’s that I worked with during that semester shared my love of crafting – although, we’re all art teachers so crafting comes with the territory. We’re craft people, Zack! (random Friends quote, I apologize)
Anyway, my teacher helped me make the coolest lined envelopes for my wedding thank you cards. She was pretty awesome like that and we spent our free time crafting in the art room, which was pretty amazing.
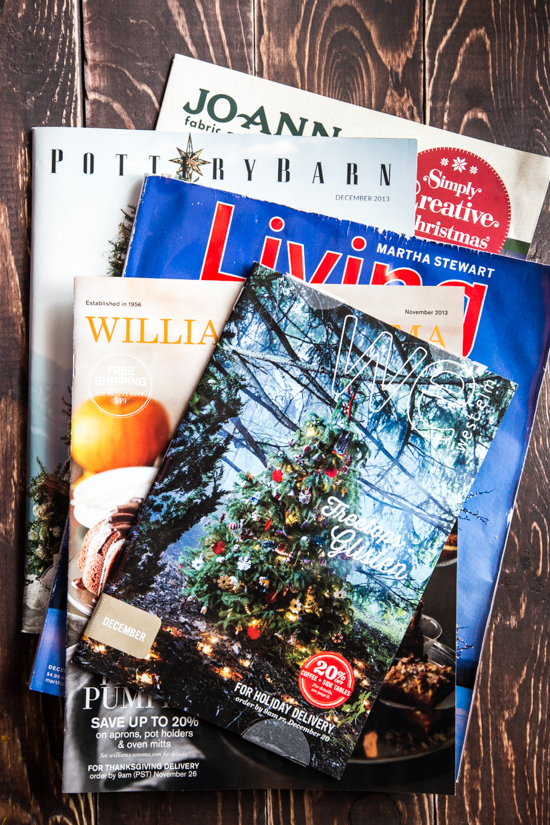
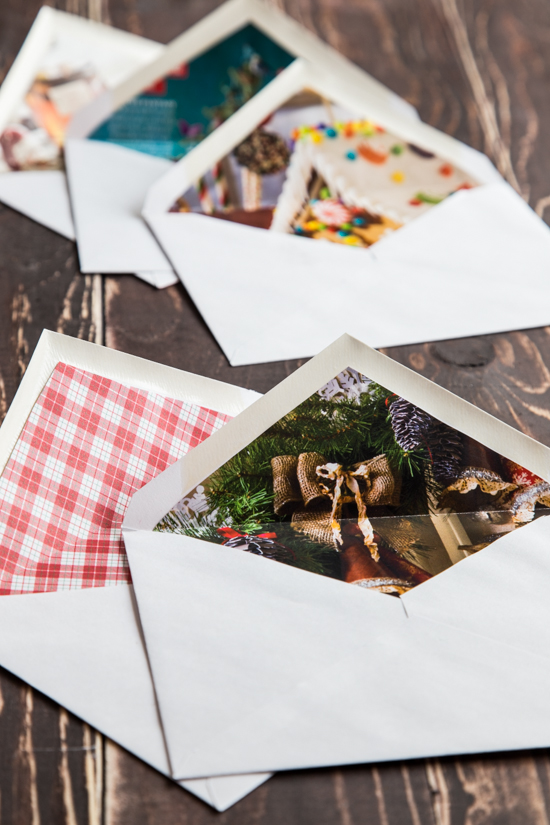
My favorite thing about this project, is that it upcycled beautiful magazine pages, covered in gorgeous imagery, into lovely lined envelopes that were perfect for a hand written thank you note. For my wedding thank you cards, I scoured my old wedding magazines because we were way past the planning stages of the wedding and no longer needed them. But, I HATED to just throw them out. I’m a total magazine hoarder, by the way. It makes it difficult when our house can’t support my magazine addiction. I’m not even sure that the White House would have enough storage space for the amount of magazines I keep…
Hoarder, I tell ya.
Anyway, the wedding magazines worked great for my wedding, so I figured using Christmas magazines from past years would be beautiful for holiday card envelopes. I also tend to keep all of the stunning holiday catalogues that show up in my mail box because the pictures are just so pretty! I have problems.
So, if you’re a magazine hoarder like me and are looking for a good use for your old magazines and catalogues, this is a great rainy day project to add a little spice to your holiday cards this year!
You’ll need:
- Christmas magazines and holiday catalogues that have pages that are larger than your envelopes.
- Envelopes that fit your holiday cards
- 1 piece of card stock
- glue stick
- scissors
- pen

Create your lining template by tracing one envelope onto your card stock, with the envelope flap opened up. Make your template about an inch shorter than your actual envelope. This allows the flap portion of the lining to slide below the adhesive strip on the envelope.
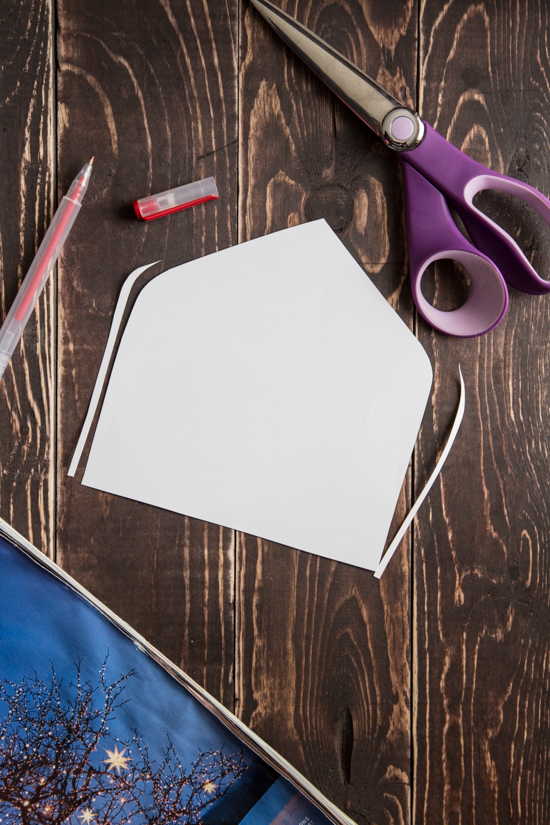 Trim the sides of your template by 1/8-1/4 of an inch. This allows the lining to slide easily into the envelope.

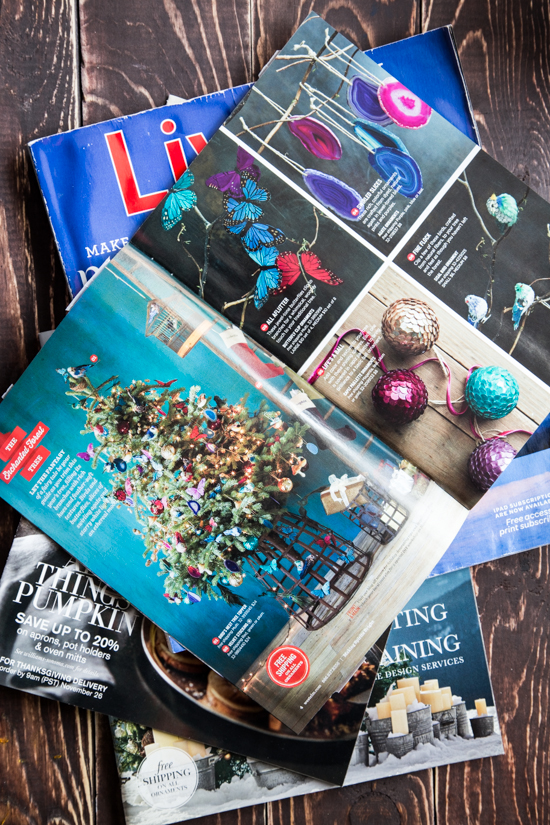
Choose a page from your magazine or catalogue with a large, beautiful image. Trace your template over the desired image area. 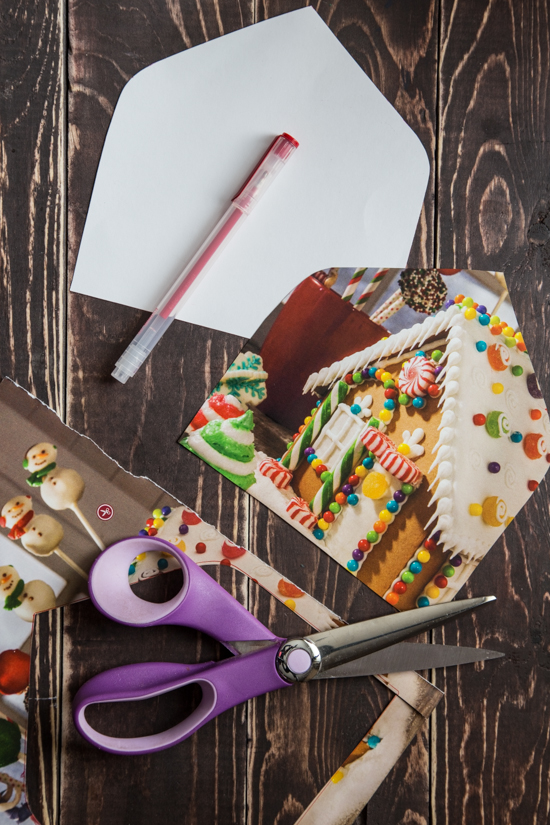
Cut it out. 

Slide lining into an envelope, being sure that it is lined up below the adhesive strip on the envelope flap.
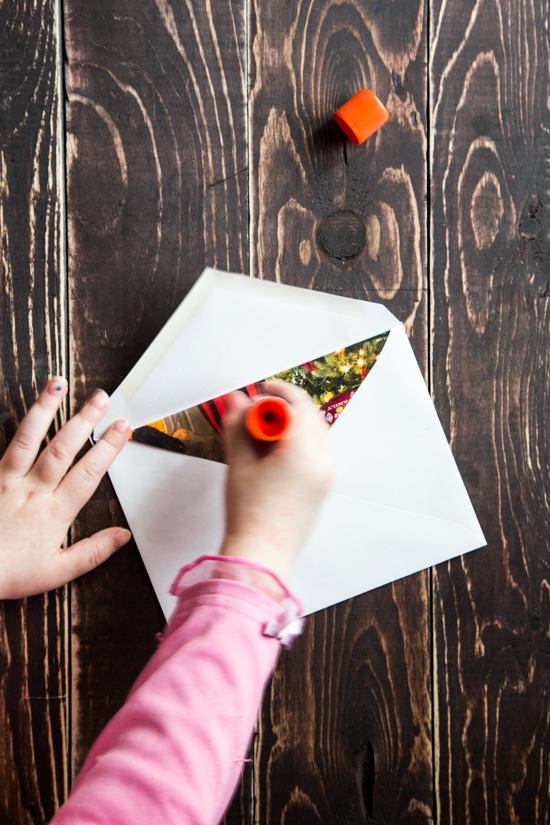
Fold lining down (like the flap) and apply glue stick to the back side of the lining flap.

Unfold lining flap and press the lining down into the flap of the envelope to secure. Allow lining to dry before inserting your cards.
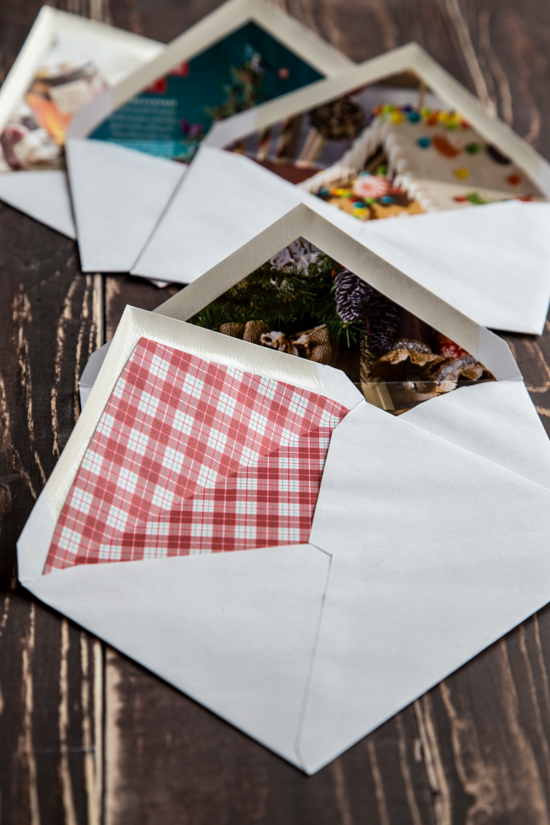
There you have it! Cute and festive lined holiday envelopes that put that pile of old Christmas magazines to good use. If you’re not into the eclectic look for your envelopes, this same technique can be done with scrapbook paper. Simply trace the template on a piece of festive scrapbook paper and voila! Perfectly matched lined envelopes.
Enjoy and Happy Tuesday!!
-3")
Love it. I better get one. 🙂
You know it!
Holy cow!! How absolutely ADORABLE are these?!? I love it! Lining the envelopes adds such a cute and festive flair. So creative!
Thanks, Kate! These are so easy to do and can be made pretty much from any pretty magazine or paper, which I love!
Pingback: Tuesday Links to Tangles, Tutorials and Giveaways #zentangle #Giveaways #ArtJournal | lifeimitatesdoodles
Oh, look at that cute little hand of your helper 🙂