New Year, New Kitchen | Black Stainless Kitchen Renovation
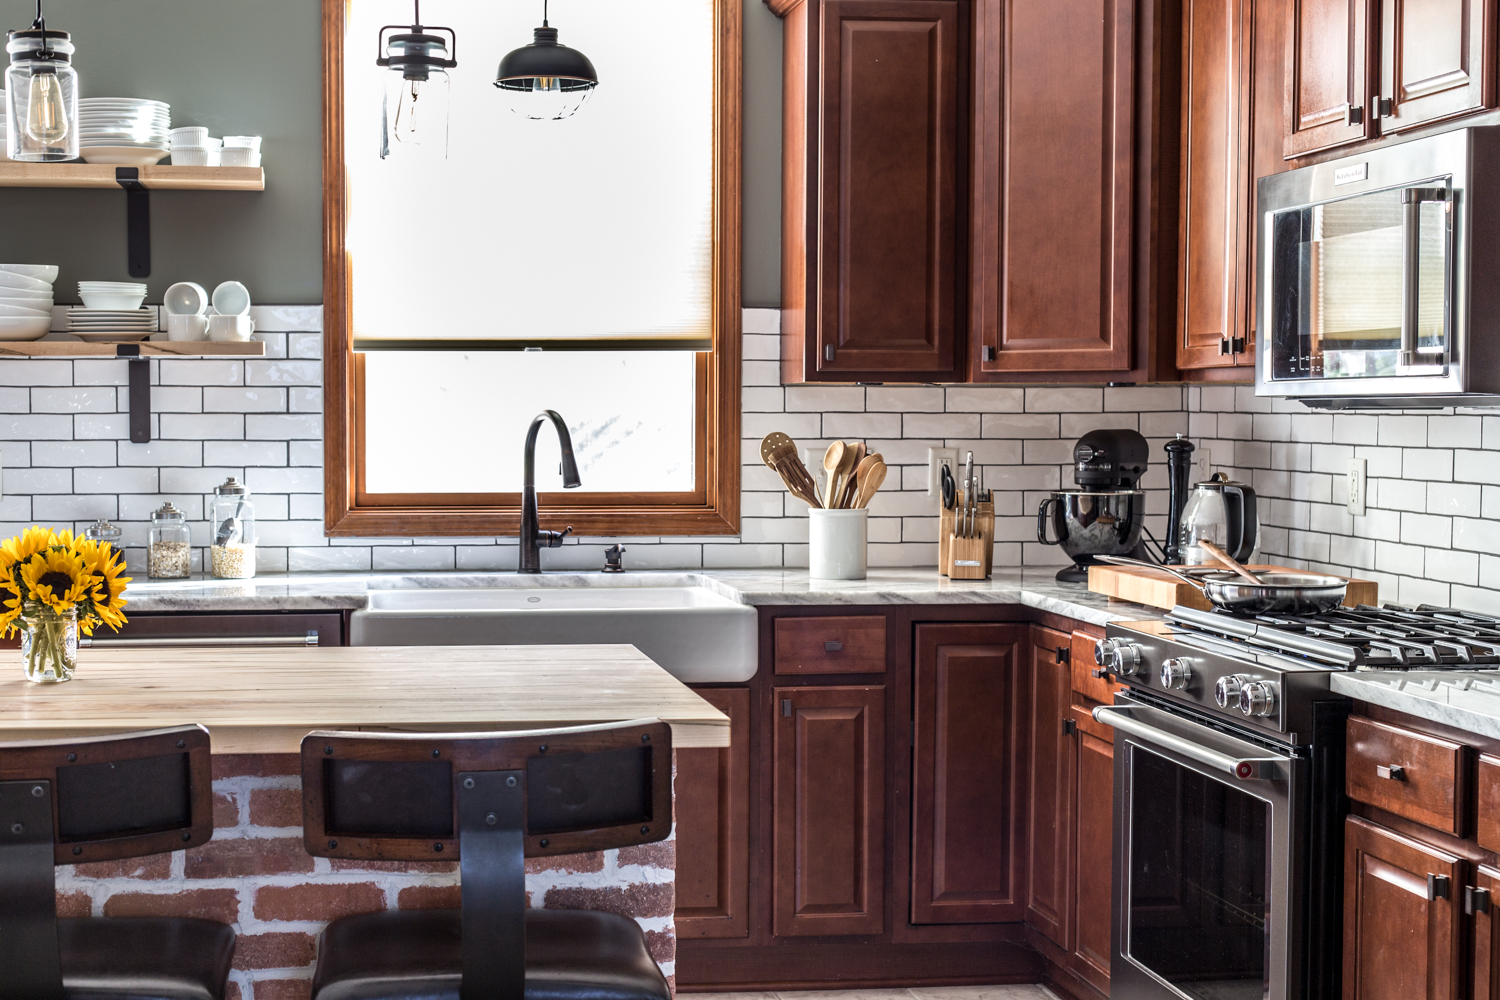
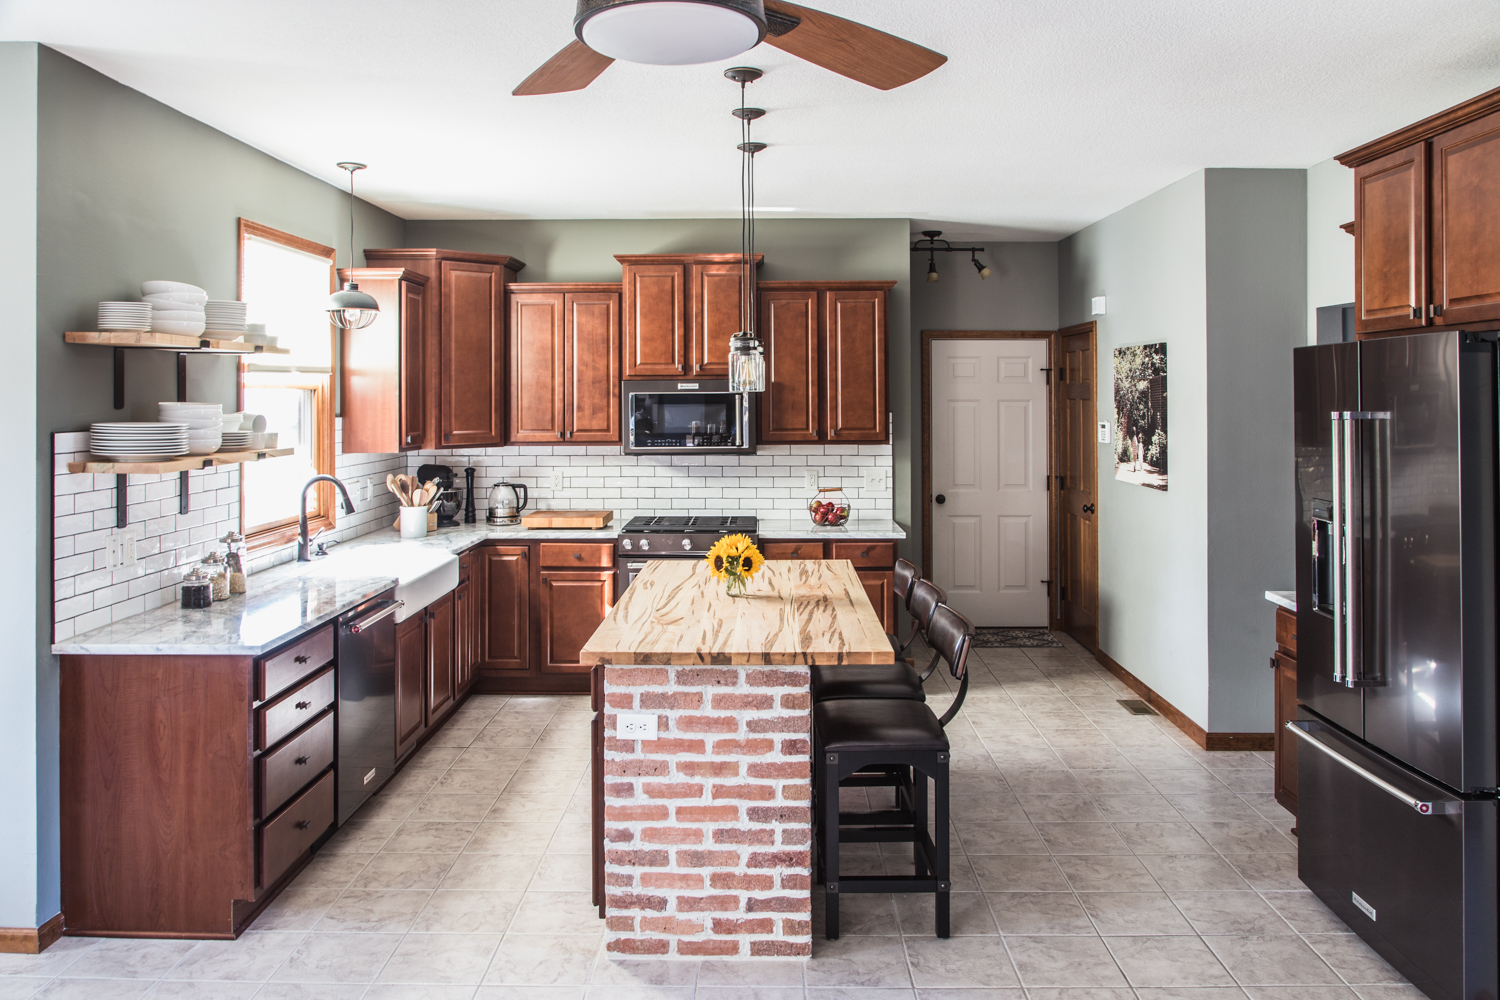
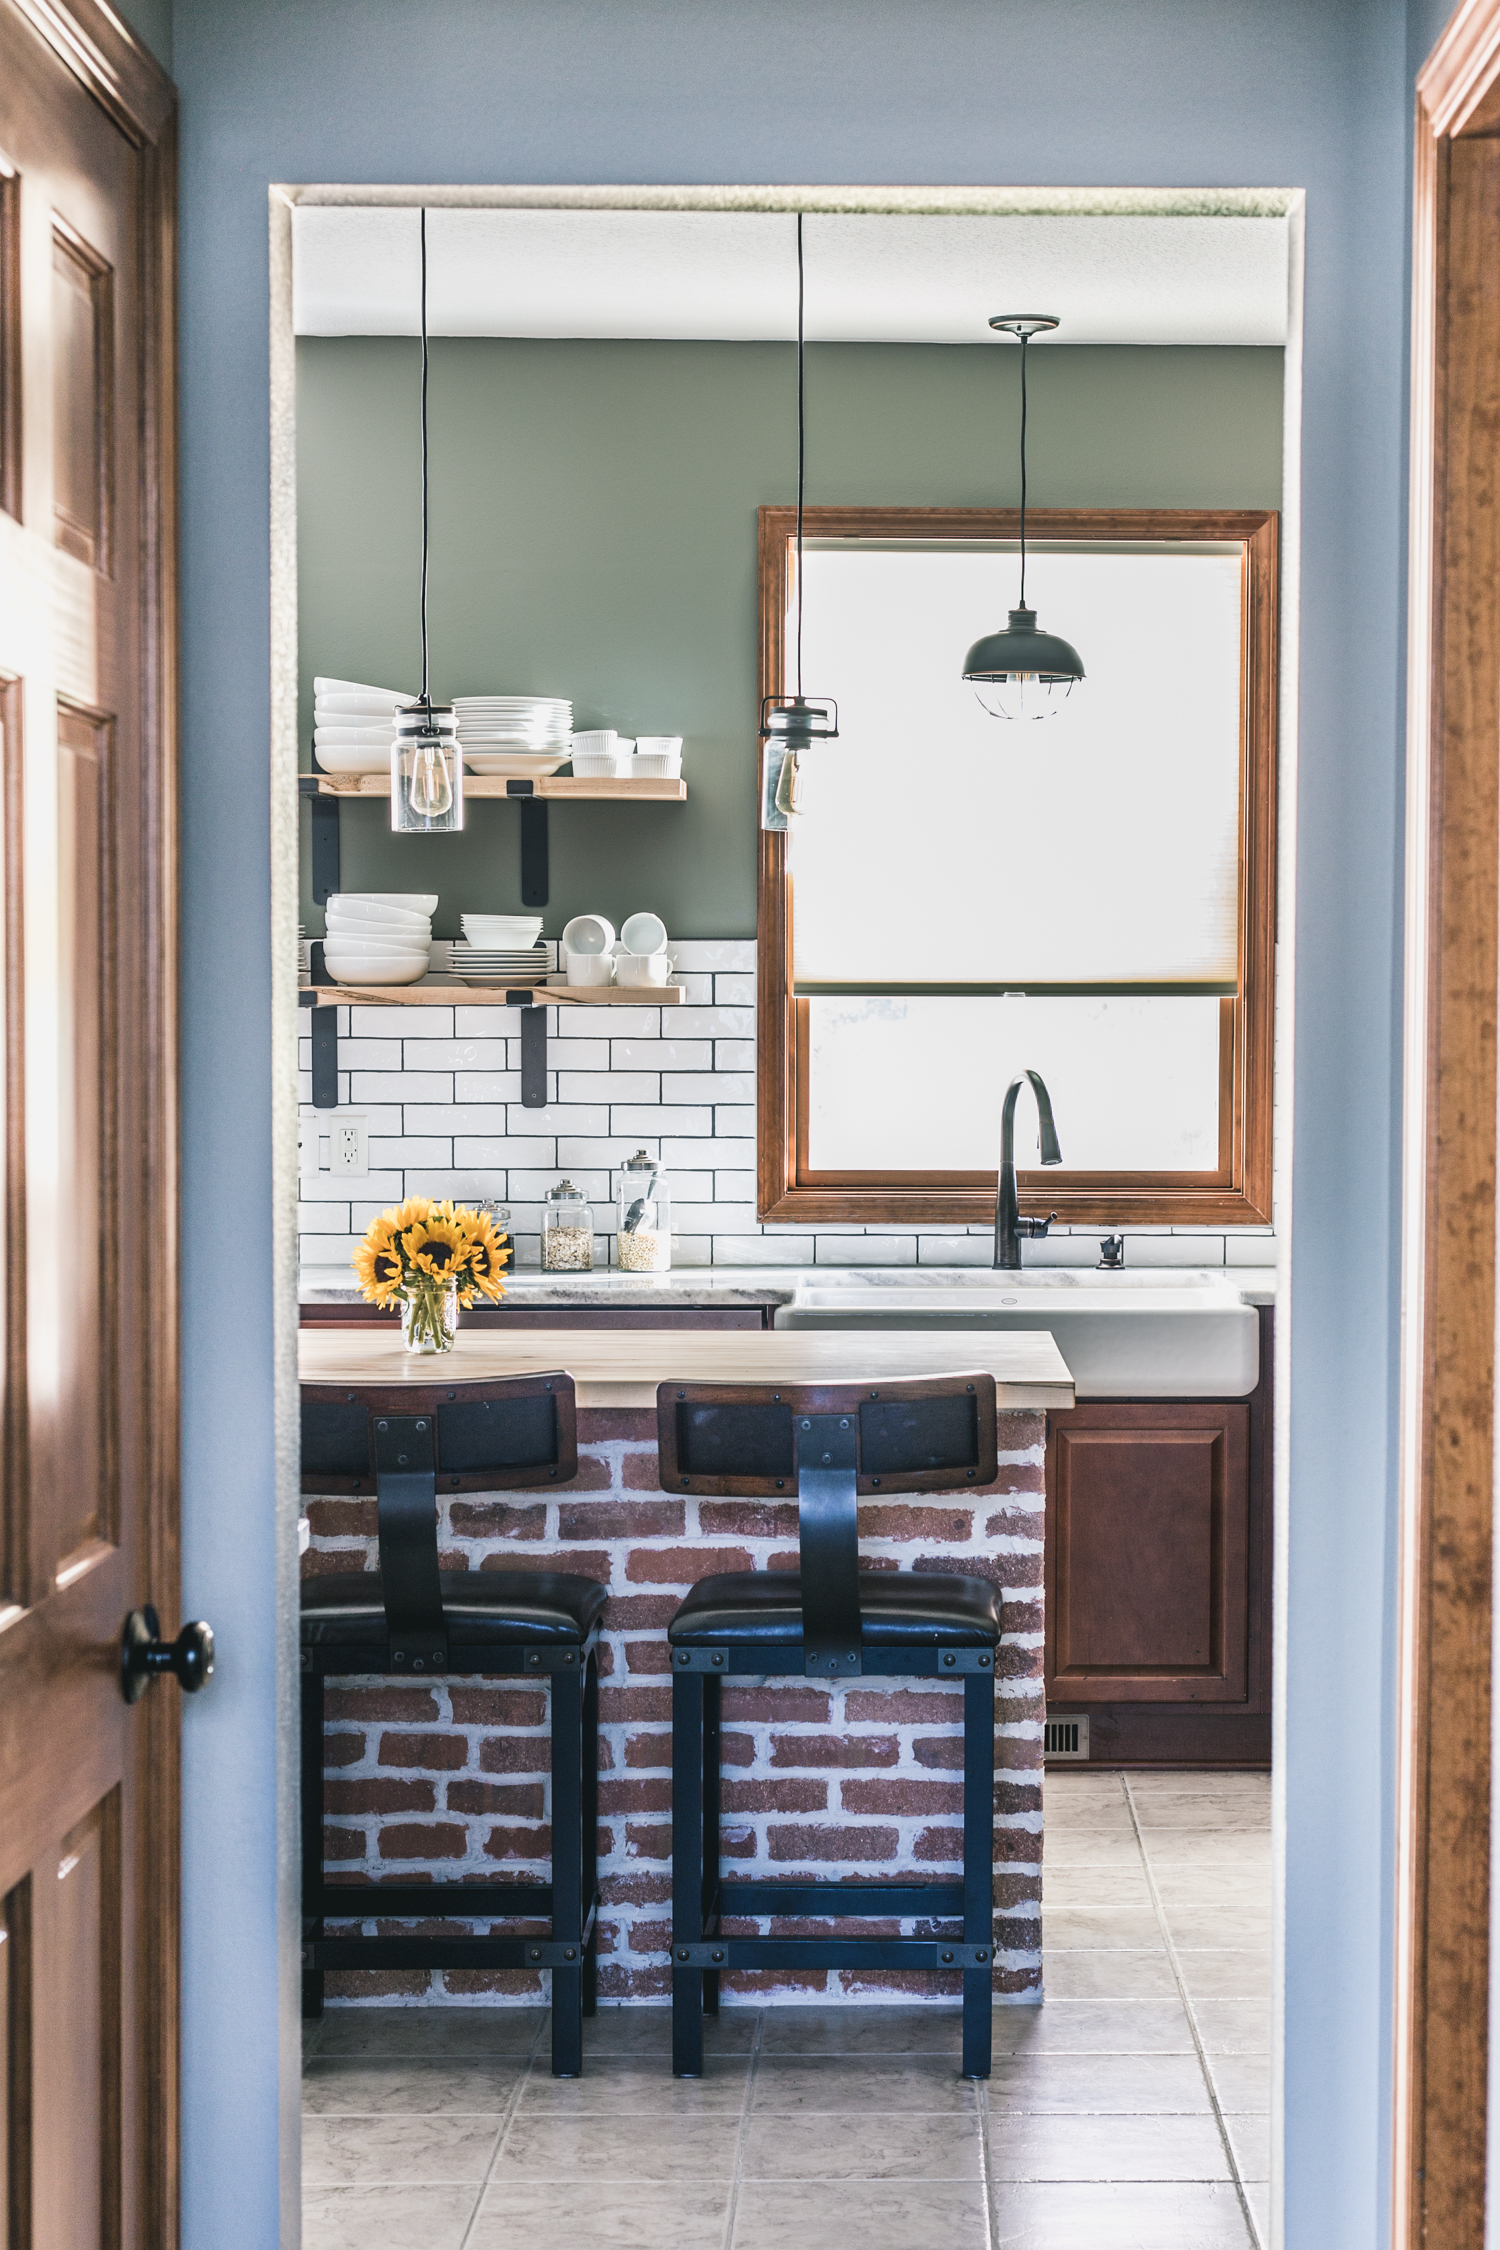
I have been so excited to share this post with you and I have finally finished. Welcome to my new black stainless kitchen renovation!
This post is sponsored on behalf of KitchenAid®. All opinions are my own.
Back in early summer, I shared this post, Kitchen Design Inspiration // Rustic Coffee Shop, all about my kitchen design ideas and how we were going to do a little sprucing up in our kitchen over the summer and fall. In complete transparency, we finished the project about 2 months ago, but I really wanted to spend some time in the kitchen and get used to the changes we made so that I could speak to each feature with a more complete understanding of their pros and cons.
I’m happy to report that we are dealing with mostly pros, however there are a few cons to consider with each element if you are working on a renovation in your own kitchen. I have outlined the major points of renovation that we worked on complete with pros and cons of each and links to sources where possible (note: some links are affiliate links).
Black Stainless KitchenAid® Appliances
Having worked with KitchenAid over the last several years to develop recipes for their blog, I was excited when they approached me about working with their new, gorgeous Black Stainless kitchen appliances as part of our kitchen renovation. We had been interested in upgrading our black appliances to black stainless down the road, so it was a perfect fit for us.
Black Stainless Pros:
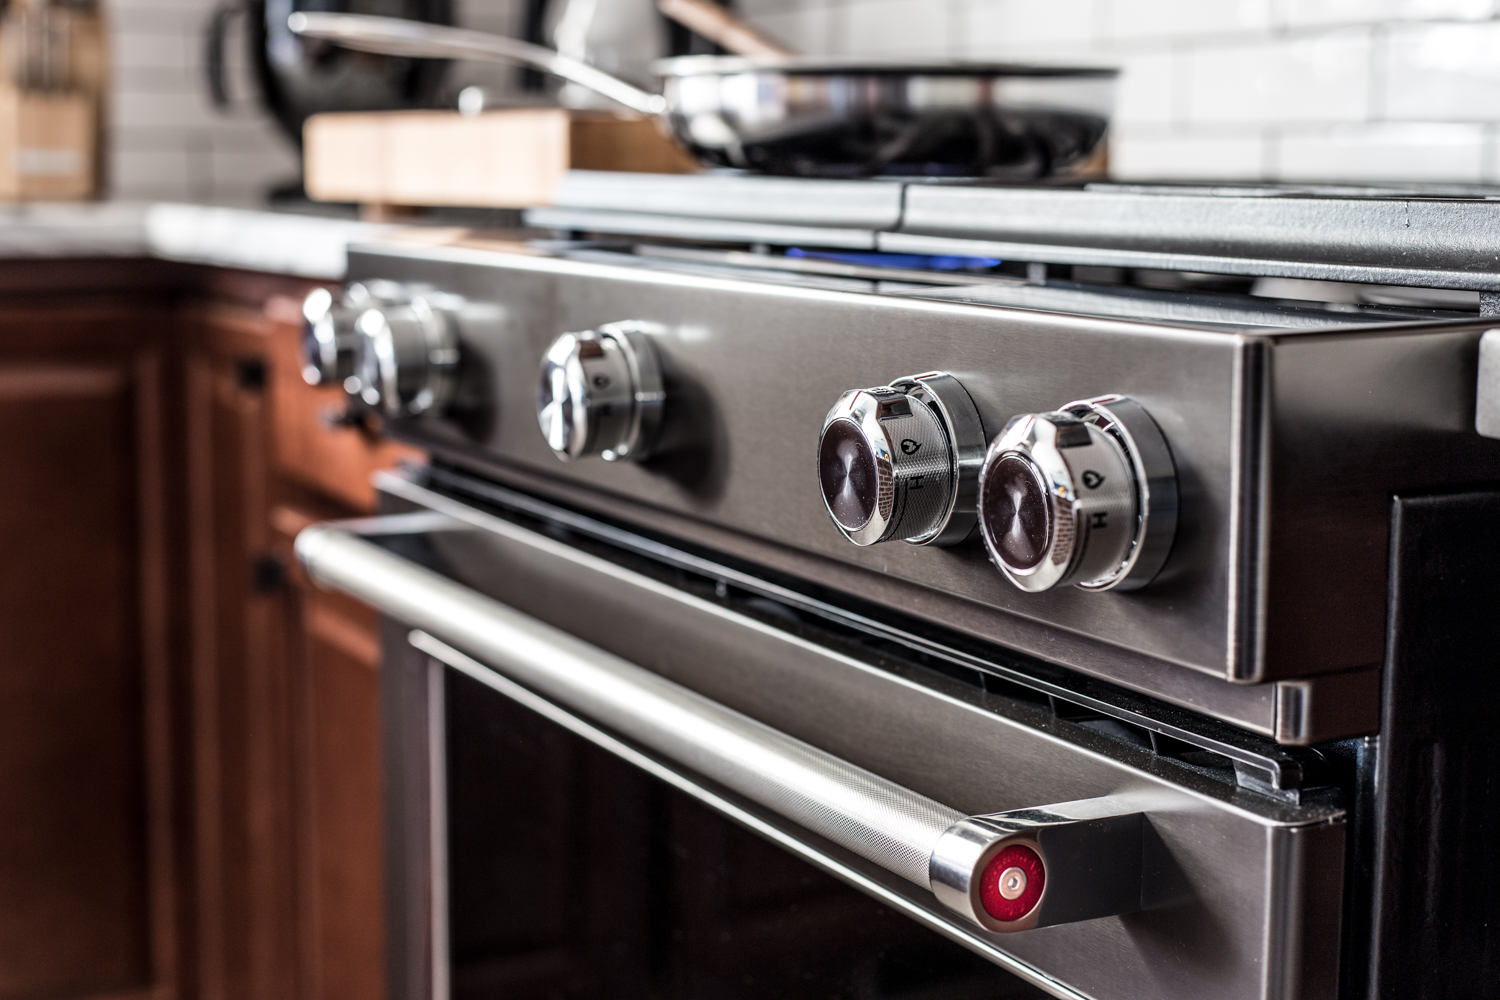
- I am basically in love with the matte black finish of these appliances. They are dark, without being a void of light and too visually heavy like traditional black appliances. Yet, they are more commanding than traditional stainless. The sleek lines are clean and refreshing with touches of chrome that pop off the darker black stainless finish.
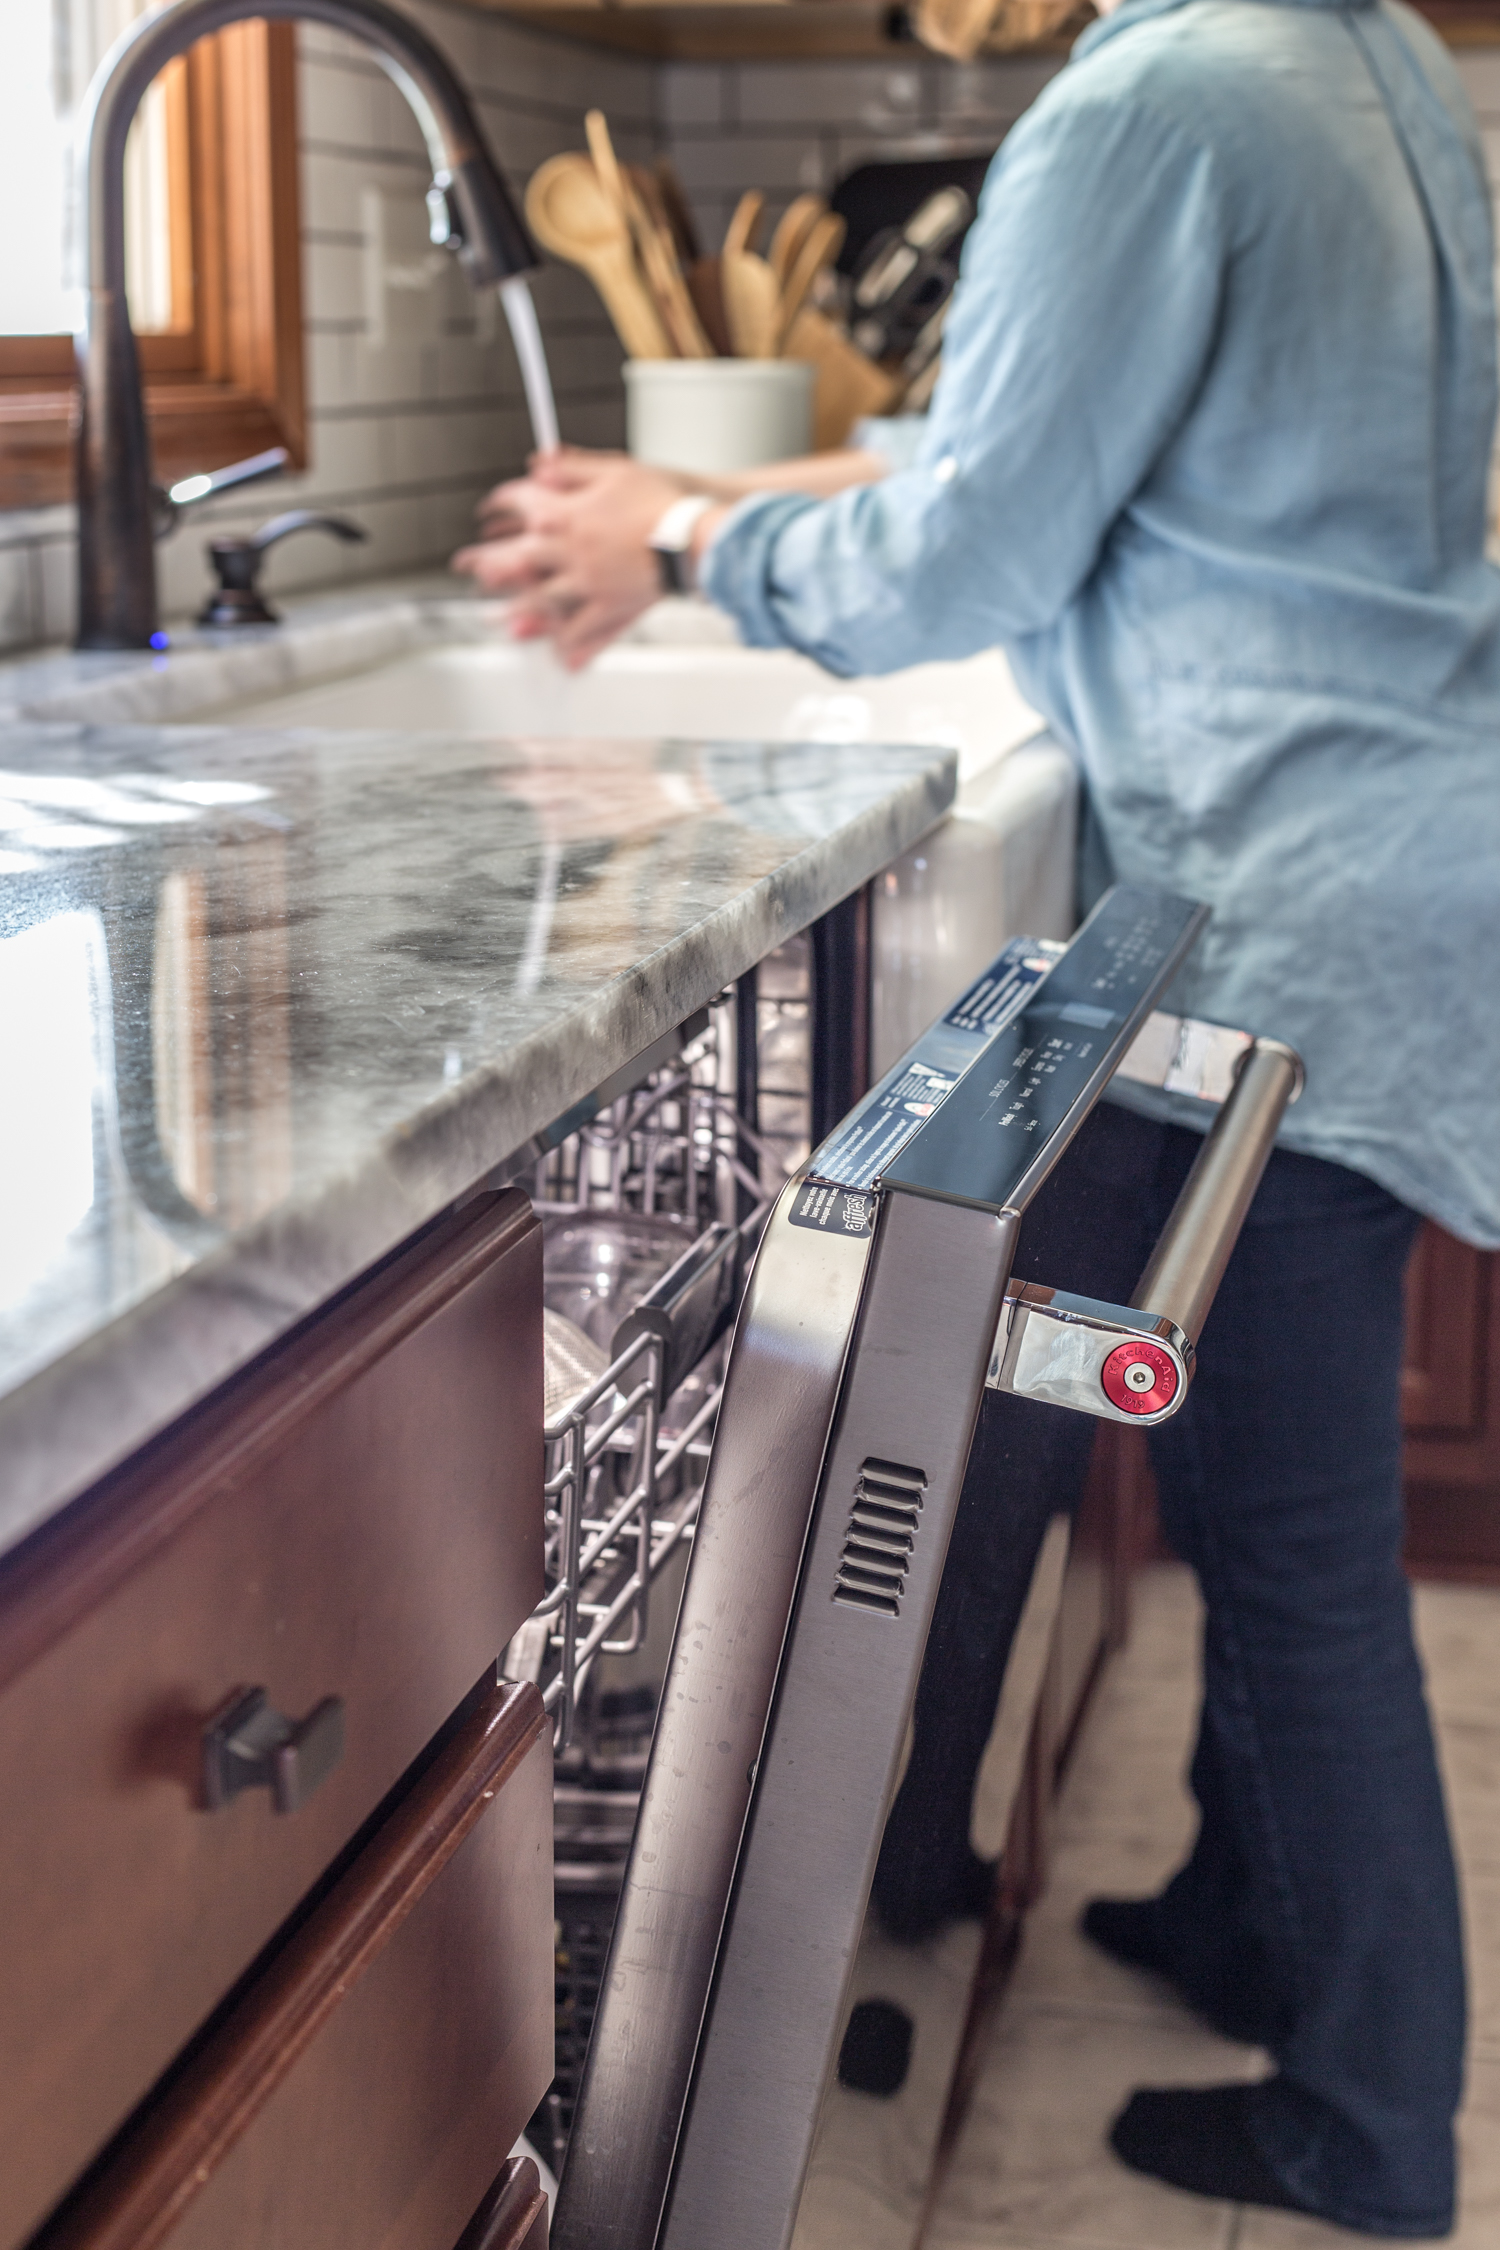
- This may seem odd, but the feel of the ‘close’ of every single one of the appliances is like butter. It’s a gentle but firm close on all of the doors that make using each of these major appliances a dream.
- The sound of the dishwasher is my new favorite thing. This dishwasher is so incredibly quiet that it can be running without me being aware. I have often opened up the running dishwasher ready to unload or load and interrupted a cycle because it was just too quiet and I didn’t realize it was running.
- Stove Top: The burners on the 5 burner range are incredibly beefy. They have an industrial feel that is strong, but responds to subtle temperature changes in the knobs. I love the solid grid of grates that allow me to slide pans around while cooking.
- I could go on and on with the pros of these appliances, so for more specifics of each, check out my Jelly Toast Kitchen Reveal on KitchenAid’s blog.
Black Stainless Cons:
- While the finish is very easily cleaned and resists fingerprints well (thank goodness!), the black stainless finish is a coating on the surface and can be scratched with sharp objects. Now admittedly, this is not a surprise as ANY appliance can be scratched with sharp objects, but it’s worth noting that it can and might happen if you scratch a knife, rough piece of glass, or anything sharp along the front of these appliances. Trust me, I learned this the hard way.
Countertops
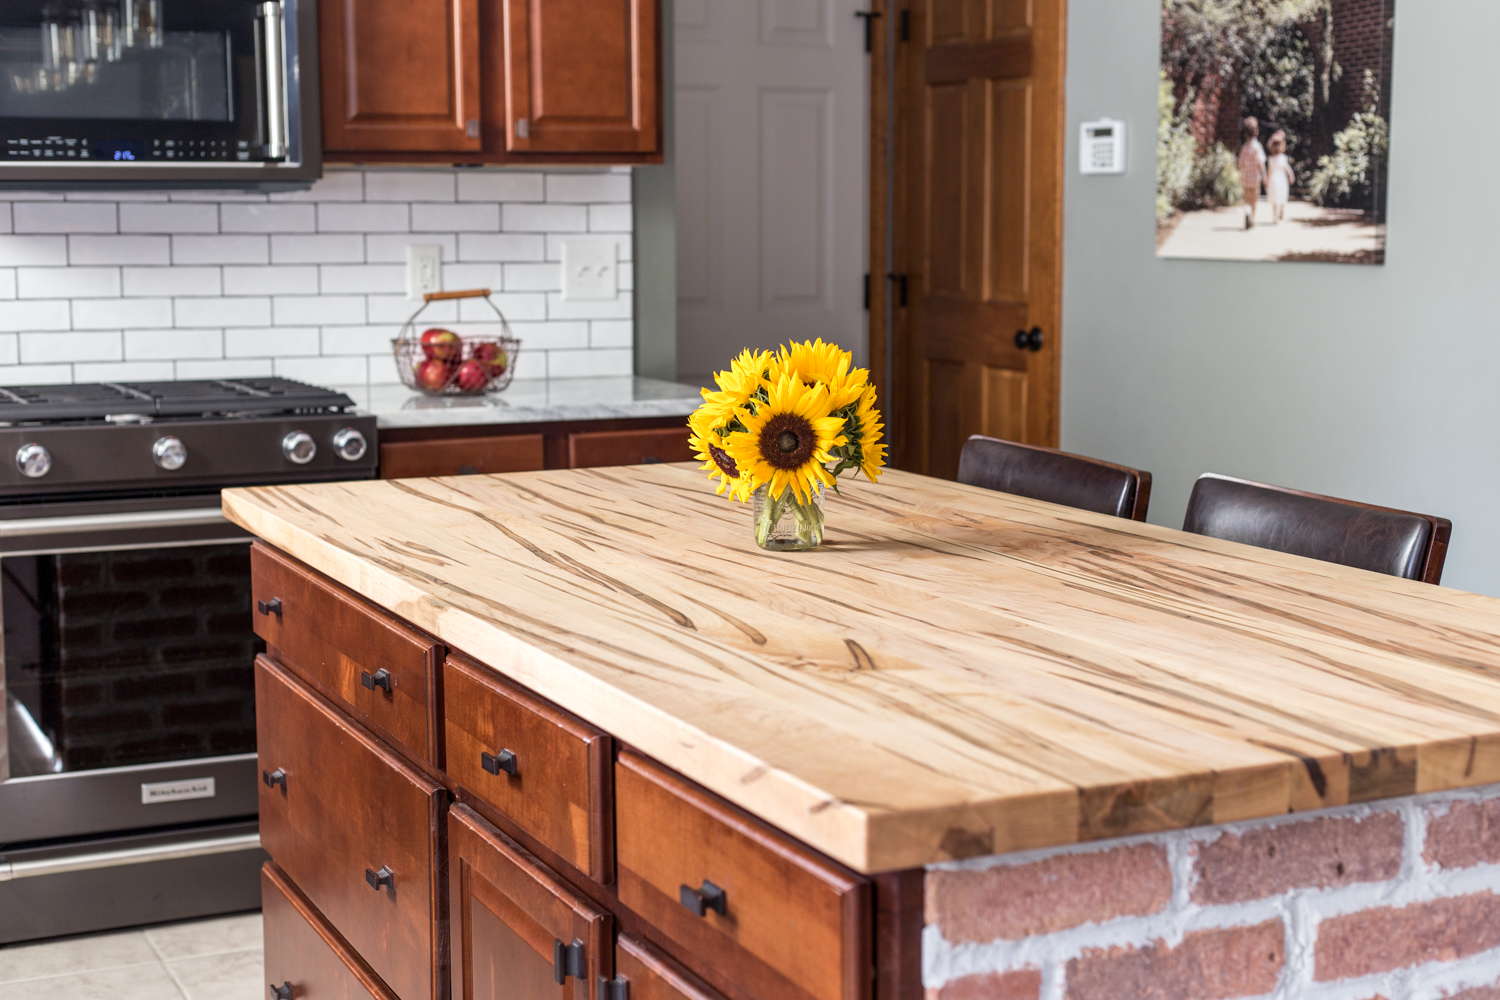
For our black stainless kitchen renovation, we went with two different countertop materials for the ultimate contrast: natural quartzite for our surrounding countertops and rustic maple for our island. I have always wanted a statement island and choosing contrasting countertops really helped make our island a showpiece. I will be posting a specific post about the details of our DIY brick island later this week, but for now, I will rundown the pros and cons of both countertop surfaces we chose.
Quartzite Pros:
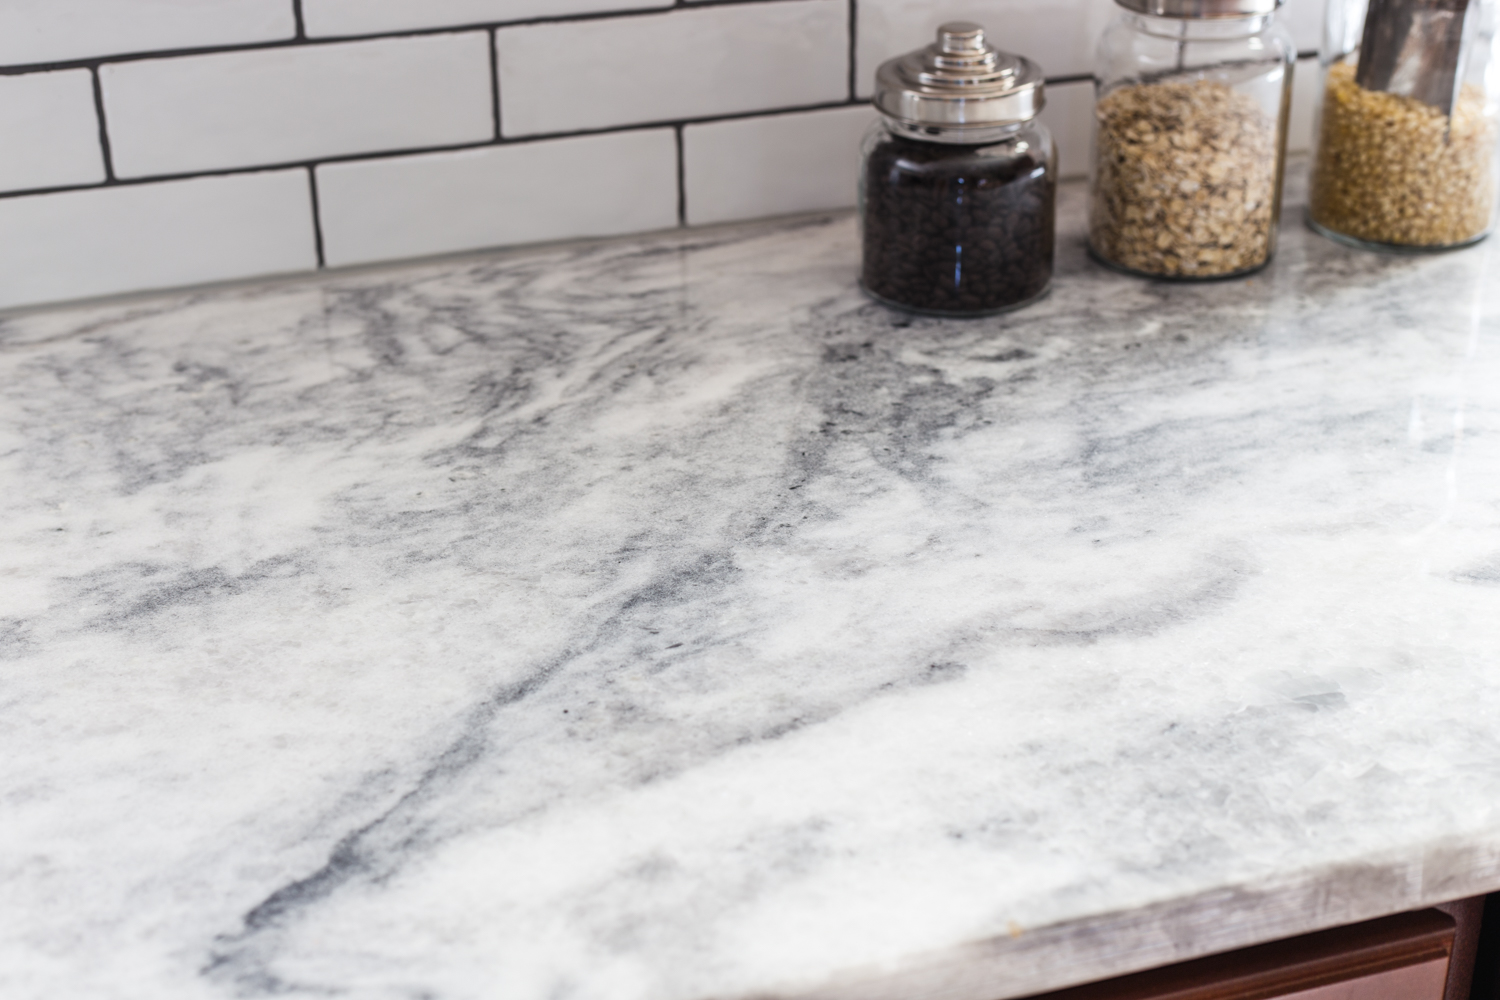
- Marble-like look with increased durability: I have always dreamed of marble countertops but knowing their delicate and soft nature, I just could not bring myself to put them into our kitchen. I am not diligent house keeper and have a reputation for being extremely messy when I cook, so having something that could not tolerate that was just not an option. Quartzite, on the other hand, is much more durable than marble and more stain resistant. (It’s worth noting that in the realm of natural stone, granite is the most durable, even more so than quartzite, but it was not going to give us the look we were after for our kitchen.) The quartzite we chose is called Mont Blanc and we purchased it from a local retailer. This particular stone was originally beyond our budget, but due to the size of our project, and not needing a piece for our island, were were able to purchase a remnant slab at a discounted rate. Definitely speak to your natural stone retailer about remnant slabs if you are looking to install new countertops because it might be an option for your project, too.
- Easy to clean: When we purchased our quartzite, we also purchased the 20 year sealer for extra protection (see above re: messy cook/terrible housekeeper). To clean the countertops, I just use a mild soap and water solution and between that and the sealer, these countertops are stunning!
Quartzite Cons:
- Random Sparkles/Imperfections/Divots: Quartzite is a natural stone, and with natural stone comes what some could perceive as imperfections. We knew this going in and have no issues with this, but it’s worth noting if this is something that will bother you. These are not manufactured countertops and therefor will have random color inconsistency and sparkles that will catch your eye and make you think something is on the surface. I often walk by and run my hand over the counter thinking there is something there but in reality it’s just the light hitting the surface in a funny way. There are also spots where there are very small divots and at the edges, can have some small ‘chips’ where the crystals have been cut. We have a couple of small spots by the edge of our sink that we are going to fill with a special epoxy and I will cover that process in another post. These aren’t necessarily deal breakers for us, but something to consider when choosing your materials.
- Cleaning: Yes, this is in the cons as well as the pros. The thing is, you have to be careful when choosing your cleaning products with quartzite (as well as the wood). You want to choose a pH balanced detergent and avoid anything vinegar, ammonia, or bleach based. There are store bought products available or you can use mild soap and water. I honestly use dish soap most of the time. It’s not difficult, but it’s worth nothing that you can’t just use any old cleaner to wipe up a spill.
Rustic Maple Pros:
- Looks: You guys, this might be one of my favorite elements we added to our entire kitchen. I am so in love with our island that it will warrant it’s own post (coming later this week with other behind the scenes photos). We had a local wood store called KenCraft Company piece together this countertop slab to match our floating shelves and they did an amazing job! We finished and installed the slab ourselves, which took a little research and coordination, but nothing too difficult. More details on products we used for installation as well as the brick coming soon.
- Care: Like our quartzite, I use a simple mild soap and water solution to clean this daily. The surface is buttery soft and I can’t help but run my hands over it every time I walk by!
- Feel: It’s worth noting that we do not use this as a butcher block counter top, meaning we do not cut or prepare food directly on the surface. That was an intentional choice and we would have finished it differently had that been what we wanted to do. I was more interested in retaining the beautiful look and feel of the wood than having a built-in cutting board, so that is something to consider if you are looking for a traditional ‘butcher block’ surface. We chose a natural linseed oil product that projects the wood without a thick, shiny polyurethane layer (see cons below).
Rustic Maple Cons:
- While the rustic maple is easy to clean, I have been more aware that certain things could potentially stain it or be difficult to remove. For instance markers, sharpies, etc as our kids use the island for homework and the occasional craft. With our old Corian countertops, I would just use some kind of bleach solution to clean the heck out of it, but that is not an option with either of our new countertop surfaces. Although, I can’t guarantee that’s the way I should have been dealing with the Corian to begin with it was a reality that I often had marker to remove. That’s not an option with the wood. We did not want to add a thick polyurethane layer to the wood, so it’s got a raw, porous feel to it that makes me nervous it will soak in marker. As a solution, we purchased desk mats (similar to these) for the kids to use on the island whenever they are doing homework or wanting to color. They protect the rustic maple countertop and provide a nice surface for their homework. If our kids were younger, I may have needed to ban them from any ‘writing’ implements at the island, which is a point to consider when choosing your surface.
- Cleaning: The cons to the cleaning are similar to the quartzite – nothing harsh, just mild detergent.
Farm Sink
This is another element in our kitchen that I am giddy that it worked out. We went into this renovation with a firm decision to keep things in a budget and not change the major footprint of the kitchen (i.e. don’t touch the cabinets in any major way). We love the cabinets and really didn’t want to take on an unnecessary change or expense. That being said, I really didn’t think a farmhouse sink was going to be doable.
Most traditional farmhouse sinks need a specific cabinet base to allow for their deep basin which when starting a kitchen from scratch is absolutely doable. When working with existing cabinets, it can be a little tricky. That is, until we found this sink.
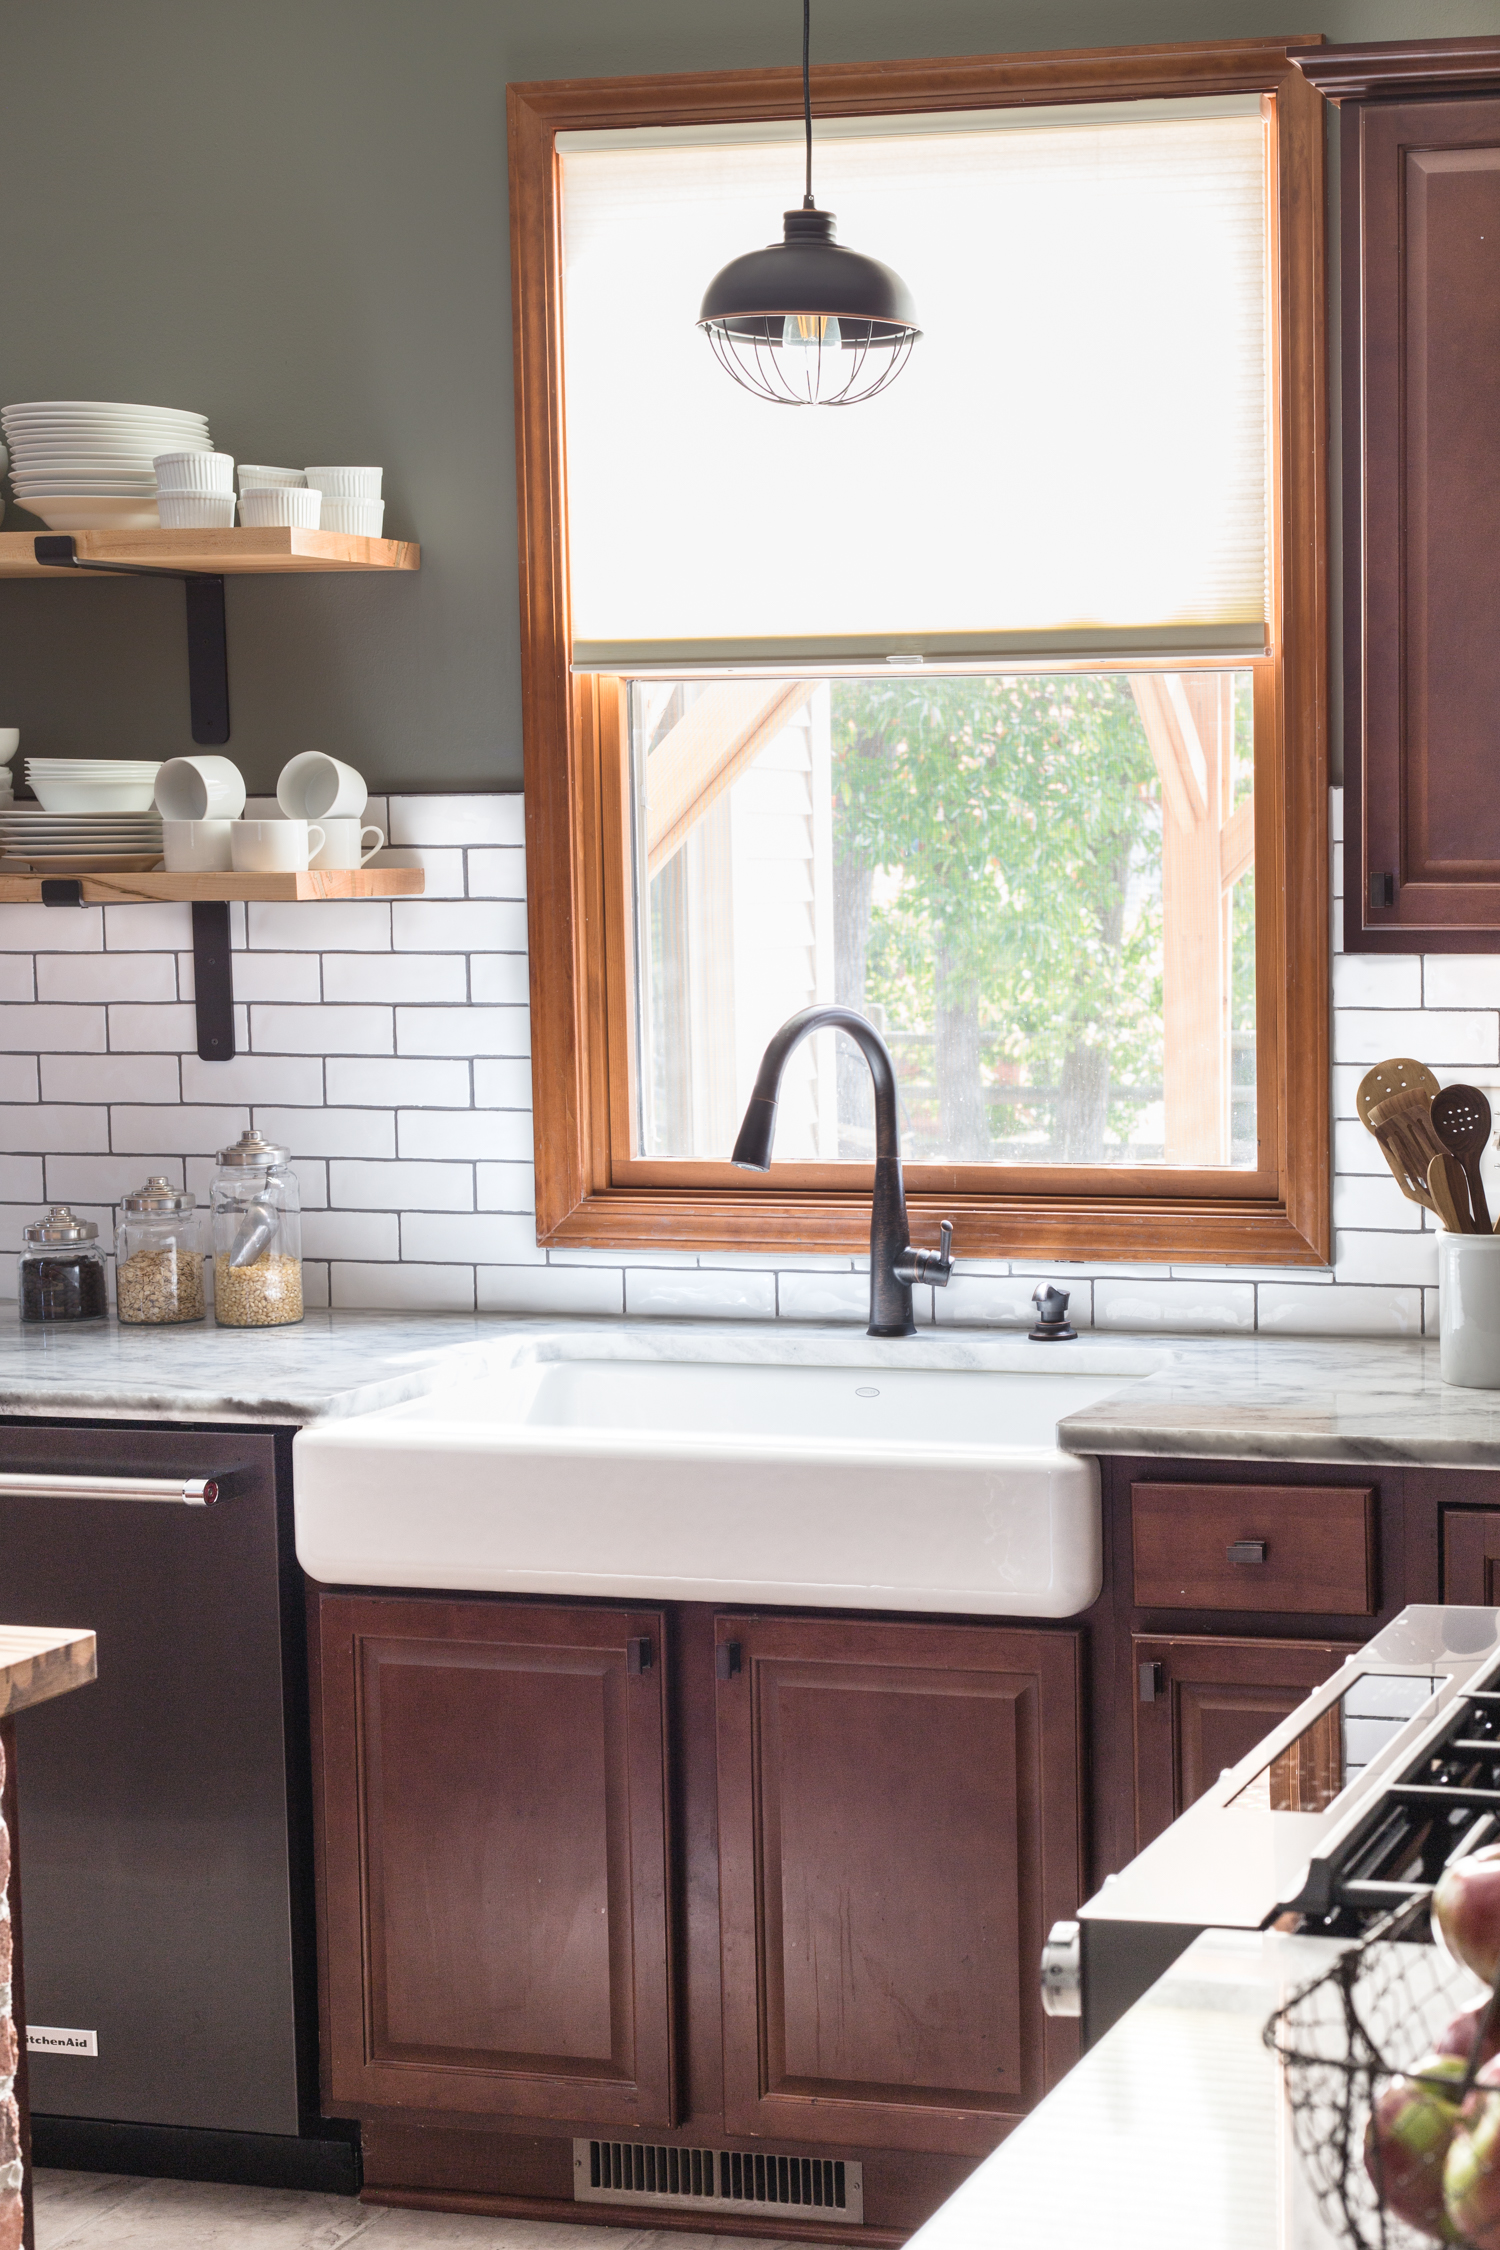
After doing a bit of research, it turned out that Kohler makes a Whitehaven Self-Trimming Apron Front sink specifically designed to retrofit into stock cabinets. No special base cabinet needed. I adore this sink!! My pros and cons deal specifically with this Kohler sink that we purchased from a local retailer but some may be applicable to traditional farm house sinks, as well.
Kohler Whitehaven Farmhouse Sink Pros:
- Size: I love the one big basin of this sink. It allows me to put pots and pans down into the sink to wash or fill without having to tilt the pan at an odd angle. It’s worth noting that this sink comes in a divided basin option if you prefer having two separate sides. I, however, do not.
- Looks: While this look is trendy at the moment, it’s rooted in traditional style so I’m not concerned that it will go out of fashion. It’s straight up timeless, friends!
- This model of sink only took minor carpentry skills to install and fit into our existing standard size kitchen cabinet. I can’t stress this point enough!
- Easy to clean: I use my sprayer to spray down any bits of food that are hanging out at the bottom of the sink. Any spray cleaner seems to work for the day to day cleaning (just be careful not to get it on the surrounding countertop!). For when the sink gets a little gunky, I use some Soft Scrub with Bleach and a little elbow grease and it looks good as new.
Kohler Whitehaven Farmhouse Sink Cons:
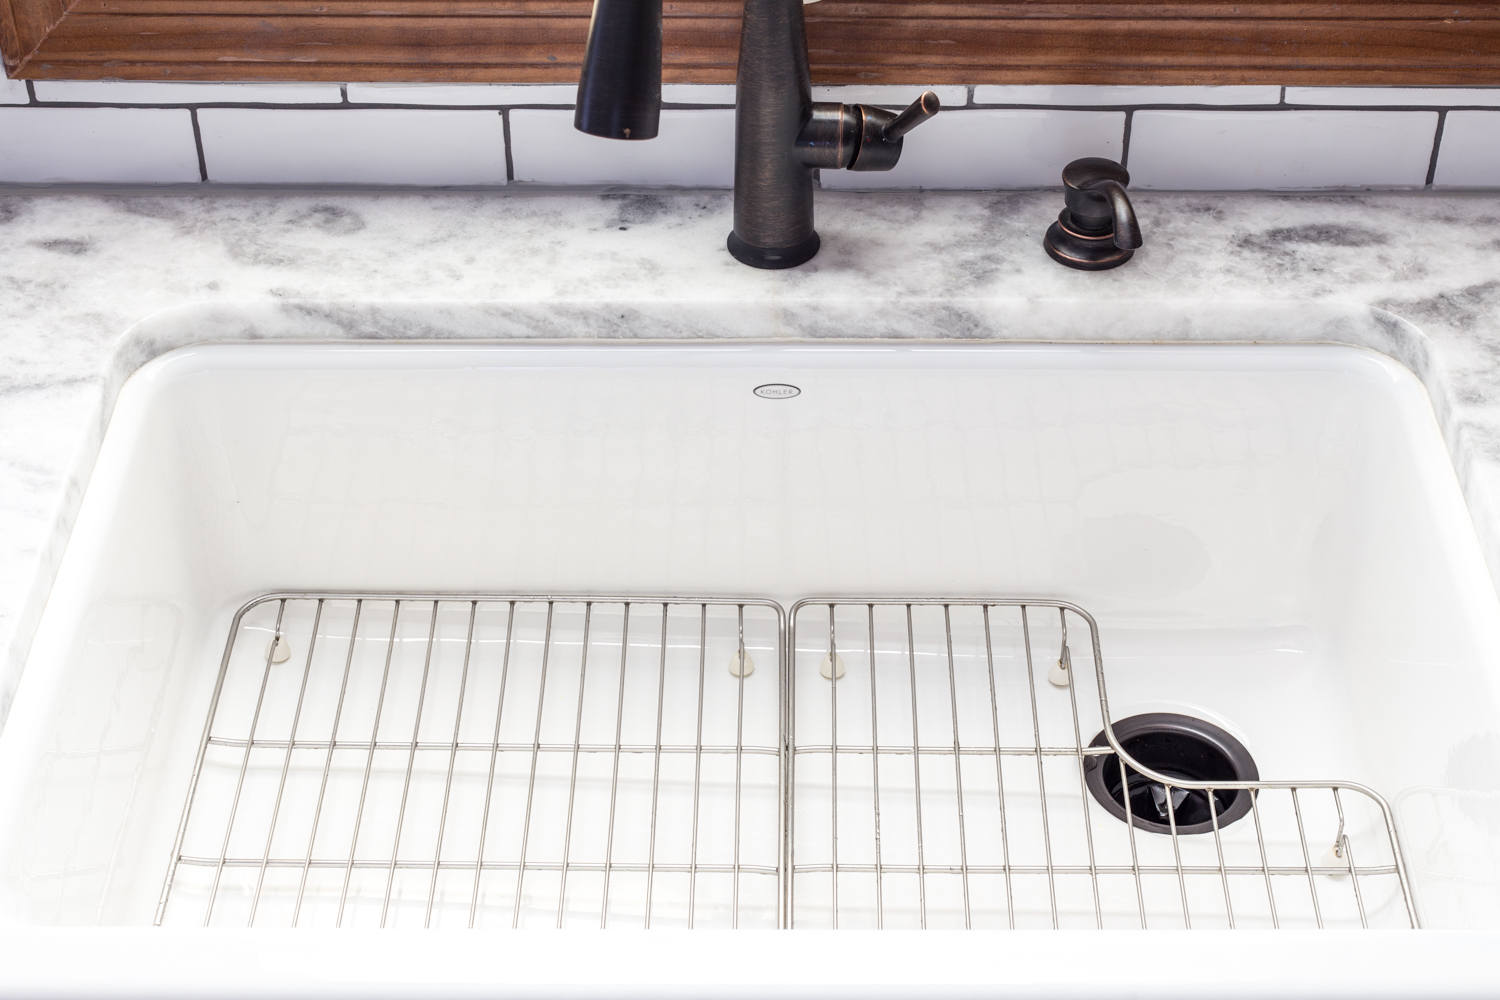
- The surface of the sink can get a little scuffed up with pots and pans. I recommend getting a rack that fits into the bottom of the sink. Kohler makes specific oneslike this one that we have.
We keep the rack in the sink at all times to protect the sink from stainless steel scuffs. If you do get a scuff, the Soft Scrub with Bleach works wonders. - This does take some minor carpentry work to install, so it’s something to research a bit before moving forward with this sink. The sink also needed to be installed (except for plumbing) before our countertops could be measured or installed.
- Does not come with a drain ring (although I don’t think any sinks do) but we purchased an oil rubbed bronze finished ring to match our faucet.
Faucet
Our faucet is actually not new to this phase of the renovation, but we installed it 2 years ago when we first moved in to our house. I received this Essa® Faucet with Touch 20 technology from Delta® (finish is Venetian Bronze) after a press trip to Alabama in Spring 2015. We ended up moving that summer and waited to install it in our new house because our new kitchen was in desperate need of a new faucet. Two years later and I am still loving this faucet! The touch technology is so handy and I find myself randomly tapping other people’s faucets when I’m at friends’ and family’s houses, wondering why they’re not turning on. I’ve gotten a weird look or two.
Delta® Essa® Touch2O® Technology pros:
- Style: The style of this faucet looks fantastic and is a great match to our oil rubbed bronze hardware. I like the dark metal with our new black stainless appliances, too. The high arch makes it easy to put pots under for filling and gives ample room to move dishes around in the sink without bumping into the faucet. The pull down sprayer is a must for our sink, as it’s necessarily to be able to direct any little debris down the drain.
- Function
Delta® Essa® Touch2O® Technology cons:
- Every once in a while, we will notice the faucet will randomly turn on. As in, no one is in the room, and I hear it turn on. We have noticed that when this happens, it seems to be to the wires under the sink have gotten bumped by something or the batteries are running low in the power supply. This is rare (has maybe happened 5 times in the 2 years we have had the faucet) although somewhat annoying. The best way to avoid this is by shutting off the handle when leaving the house or going to bed for the night. There is a built in auto-off that will shut off the faucet if it is running for several minutes, which also helps with this occasional glitch and avoiding wasting water.
- You get used to the touch technology and randomly tap on the sides of faucets in other homes expecting it to turn on. People will look at you like you’re a little wacky. I’m ok with this but it’s worth a mention.
Subway Tile Backsplash
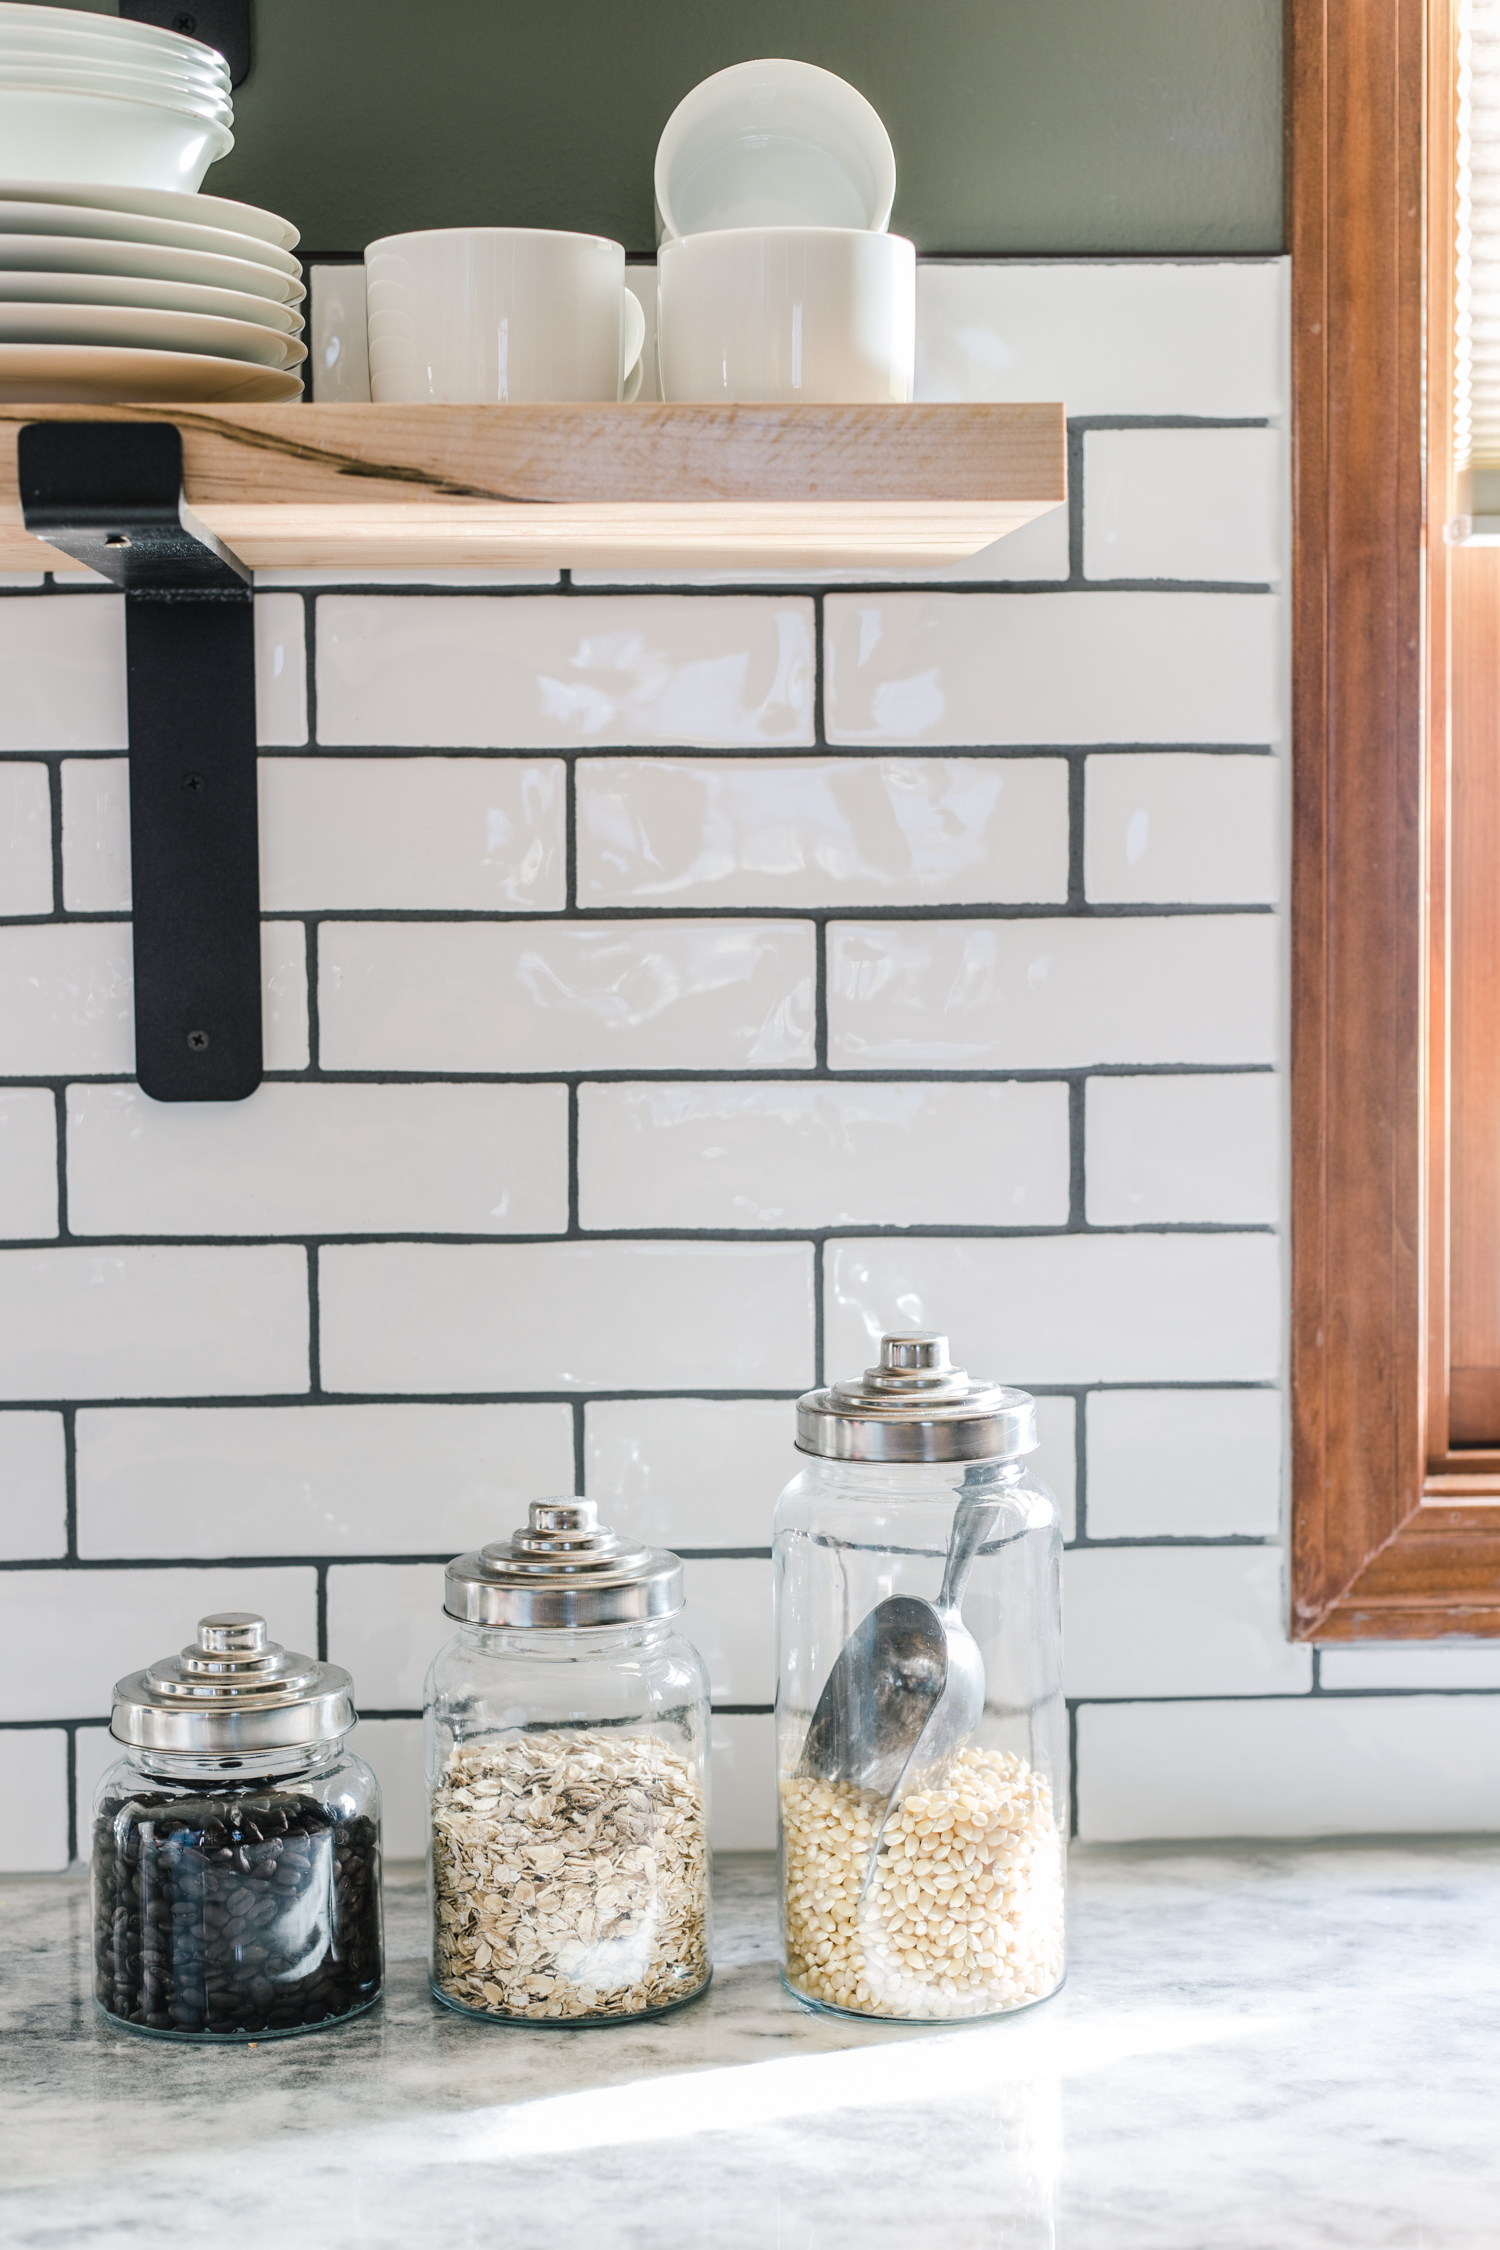
A subway tile backsplash is, again, something that I have wanted for quite some time. While I love the classic style and timelessness of subway tile, we wanted to add something unique to our backsplash, so we went with a handmade tile with longer proportions accented with dark grout. The handmade look not only gave a little more interest to the backsplash, but it made installation more forgiving for us DIY-ers. Plus, the dark grout will be easier to keep looking new.
Subway Tile Backsplash Pros:
- Tile backsplash is a breeze to clean! With our slide-in range the backsplash area around our stove gets a fair amount of splatter from cooking (hello, bacon!). The tile is easy to wipe clean and resists stains unlike our previous painted drywall.
- The addition of the tile is a great focal point in the kitchen and helps tie in our new countertops and visually connects the upper and lower cabinets. Adding a backsplash is also an easy way to make a ‘stock’ kitchen look custom. It’s a personal preference, but to me, I kitchen is not complete without a tile backsplash!
- Having the subway tile with dark grout brings me one step closer to my dream of living in a Fixer Upper home 😉 Plus it’s easy to keep looking like new.
Subway Tile Backsplash Cons:
- Installing the tile backsplash ourselves involved a lot of cutting and that can be a tedious job. Not impossible, but something to consider if you are wanting to do this on your own.
- The tile we chose did not have a matching bullnose or edge tile. We searched high and low for a matching edge tile with no luck, so we ended up using a metal edge to finish our backsplash. We love the end result, but it created a little bit of a headache when planning and searching. Just something to consider when choosing your backsplash tile!
Overall, I am beyond thrilled with our ‘new’ kitchen and would not make any changes. The mix of materials and textures is just what we were hoping for. I will be sharing some behind-the-scenes details later in the week, as well as some advice if wanting to add brick veneer to your island. Stay tuned!
Happy New Year!!!
xoxo, Emily
Disclosure: Thank you to KitchenAid® for providing appliances for our black stainless kitchen renovation. Delta provided the faucet as part of a press trip in 2015. All other materials discussed in this post (countertops, sink, tile backsplash, island brick) were paid for by us and purchased from local retailers.



Emily,
I love the kitchen! You and Phil did a wonderful job. Congrats and thanks for all of the pros and cons.
Heidi
Thank you, Heidi! I’m so happy you like the final results 🙂 It was an exciting project to work on!
It’s so beautiful, Emily! Thanks for sharing!
Thanks so much, Christina!! xoxo
It’s so beautiful, Emily! Thanks for sharing! <3
Happy New Year! Love the new kitchen, and the black stainless steel is gorgeous. I have been eyeing it in a few places recently. You have definitely sparked the interest in redoing our kitchen. While it is fairly new, I still would love to rip out the granite and replace with something more bright!
Emily I LOVE your new kitchen!! We have similar cabinets, and we’ve decided not to replace them, but I want to give the kitchen a fresh update with counters, backsplash, and appliances (um I’m in love with the look of the black stainless, especially with the darker cabinets!!) I’m excited to start planning our kitchen reno!!
Thank you so much, Cheryl! I am so happy we decided to keep our cabinets and I LOVE our black stainless with them! I can’t wait to see what you do in your kitchen!!